Streaming and Internet Connections

Spectrum U App

spectrumu-small.jpg

Nazareth has recently partnered with Charter Spectrum to offer the Spectrum U 9.0 App.  This app will allow students, staff and faculty to stream live TV to their personal devices while connected to the campus wifi network. No login is required to use this app. 

SpectrumU 9.0 is supported on the following devices:

  • iPhone, iPad or iPod touch running iOS 13 or above
  • All major Android smartphones and tablets running Android 5.0 or above
  • Kindle Fire Phone, all Kindle Fire models except for the 1st generation model, Roku devices
  • Personal computers running Windows 10/11 or Mac OS 10.13+.  Point your browser to watch.spectrum.net

          Supported browsers Firefox, Chrome, Safari, MS Edge

You may download the Spectrum U app for free using the Apple App Store, Google Play or Amazon.

Additional information about the Spectrum U app
 

Internet Connection Help

Internet Information

Nazareth's residence halls feature a high-speed data network and free, unlimited Internet access. In order to make use of network services such as Google Apps,Moodle and NazNet Self Service, students will need to connect their computers to the Nazareth network. Detailed instructions will be emailed to you prior to your arrival on campus.

Connecting your computer for internet access (Wired)

Use an Ethernet cable to connect your computer to the GREEN jack on the wall. These cables can be purchased at most computer and office supply stores. The computer should automatically obtain an IP address and DNS information. Please refer to  the section below on Setting up an Internet Connection for your particular operating system.  If your computer doesn't connect to the internet automatically, please call the Technology and Media Service Desk at 389-2111.

Release and renew an IP address on a PC

If you are unable to connect immediately upon arrival, you may need to release and renew your Internet Protocol (IP) address.

For Windows 10:

  1. Select the Start Menu
  2. Choose Run
  3. In the dialog box, type cmd and press
  4. The DOS window will appear; type ipconfig /release
  5. Press Enter
  6. When the IP address has been released, type ipconfig /renew and press Enter again

Attempt to connect to the Internet. If you are still unable to connect, please call the TMSD at 585-389-2111

Wireless Internet access

All campus administrative buildings and residences halls feature pervasive wireless network access.  There have been some recent changes to the wireless system in order to improve performance.

RESIDENT HALLS

With the recent upgrades to the campus wireless network, there is now only one wireless network needed for all of your devices.

NazCommunityWifi is intended for use with laptop computers, tablets, gaming consoles and smart phones.

The password (case sensitive) for NazCommunityWifi access is:

                                             GoldenFlyers

With the wide availability of wireless network access in all residence halls, there is no need to setup your own personal wireless router.  ITS discourages students from setting up their own wireless networks (including wireless desktop printers) as they could interfere with the operation of college-managed wireless services.

ACADEMIC & ADMINISTRATIVE BUILDINGS

NazCommunityWifi is also available for student use in all academic and administrative buildings throughout campus.

If you have questions about wireless access or require assistance connecting, please contact the Technology & Media Service Desk at 389-2111.

Special note about laptops and wireless access

In a resident hall environment, it is possible that laptops will detect and connect to wireless networks setup by other students. If you are utilizing your laptop's wired connection, it is advisable to disable the wireless adapter temporarily. Having both connected at the same time can cause intermittent connectivity problems. If you wish to use a wireless network, unplug any network cables from the laptop while working wirelessly.

Setting up a Wired Network Connection

Macs running OS X 10.13 and above

Make sure your PC's Ethernet cable is plugged in the GREEN network jack.

1.  Click on the System Preferences icon on the Dock

2.  Click on the Network icon

3.  On the left-side of the screen, select Ethernet

4.  In Configure IPv4, scroll down to Using DHCP

5.  Click Apply

6.  Click on the red circle in the upper left corner to close this screen

Windows 10

Make sure your PCs Ethernet cable is plugged into the GREEN network jack.

1. From the Start Screen open Windows System and select Control Panel

2. Under Network and Internet, click Network and Sharing Center and then click Change Adapter Settings

3. Right-click on Ethernet and select Properties from the drop down window

4. Make sure that TCP/IPv4 is active and checked. Then, Highlight TCP/IPv4 and click on the Properties button

5. Under the General tab, make sure the IP Address and DNS server are obtained automatically

6. Click Ok. You are done! Close any open windows.

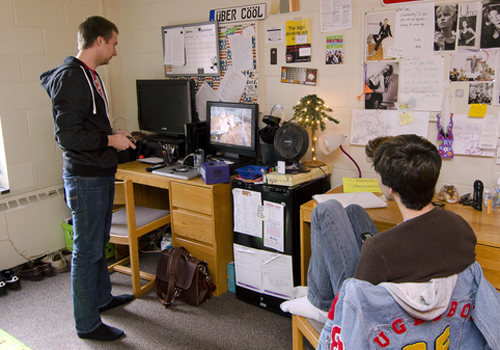
Tv and computer in dorm room

Have Questions?

Contact the Technology and Media Service Desk: